How to winterize pipes in a vacant home? What pros say
In this blog post, I will discuss with you some useful tips and tricks to save your home's plumbing from the damage that extremely cold weather can cause when you are away during the snowbird season.
How to winterize pipes in a vacant home:
If you winterize your house and leave your heating system on you need to set the thermostat at 55 degrees Fahrenheit. Make use that all the taps and pipes outside are emptied and if you have an irrigation system that needs to be winterized as well. It is a good idea to use a temperature alarm to be certain that you are warned if there is a problem with the heating system. If you want to turn off your heating system there are many more steps you have to follow.

Contents
- 1 When to winterize pipes in a vacant home?
- 2 How to winterize the pipes in your vacant home:
- 2.1 # Keep the heating on
- 2.2 # With the heating off
- 2.2.1 – Step 1: Shut off the water
- 2.2.2 – Step 2: Drain all the water
- 2.2.3 – Step 3: Blow the remaining water out of the pipes
- 2.2.4 – Step 4: Empty the hot water tank
- 2.2.5 – Step 5: Empty the water tank
- 2.2.6 – Step 6: Toilets
- 2.2.7 – Step 7: Sinks
- 2.2.8 – Step 8: Fridge and Freezer
- 2.2.9 – Step 9: Dishwasher and washing machine
- 2.2.10 – Step 9: Central heating
- 3 How to unfreeze a frozen pipe
- 4 Winterizing an irrigation system
- 5 Safety Precautions to observe while winterizing the pipes in your vacant home
- 6 Frequently Asked Questions (FAQs)
- 7 Final remarks
When to winterize pipes in a vacant home?
When the temperature of your pipelines drops just below thirty-two degrees Fahrenheit, even for a short while you may face the risk of pipeline bursting, cracking, fracture or leakage. You must make sure the areas that have indoor pipelines are kept well above freezing. If you live in Alaska then you need an all-year-round winterization.
"The purpose of winterization is to make sure that all of the water is out of the pipeline, so the system does not freeze," said Aaron Knepp, owner of a Conserva Irrigation franchise in Columbus, Ohio. "You have to get all of the water out of the pipeline. The main plumbing or the backflow device is typically outside on ninety-five percent of the jobs in our area, and that is the first thing which freezes."
When the plumbing systems are not properly winterized or winterized at all, Knepp said they can show signs of damage later on in the spring, and if the water is left behind in the pipelines during the winter, it will expand and freeze, which will cause the pipes or fittings to burst.
"You get what you pay for on this," he said. "I have seen a lot of properties where we get in the spring and they are not winterized correctly, and we end up having to do hundreds of dollars of repairs. And if they had been winterized carefully, they would not have that."
If you still live in your house you have to start with the external taps and pipes as soon as you see that one or more days with temperatures below freezing are coming. Also, understand that the temperatures that you see in the weather forecast are averages and that your local temperature can be lower or higher. Areas that experience mild winters can wait until the beginning of October or even into November before it is necessary to perform this job. For people with more intense winters, it is probably a good idea to go ahead and start the process in September.
The size of your property will determine the length of time it takes to complete this task. But if you know what to do it should not take very long to properly get the system taken care of if you are using the proper air compressor.
How to winterize the pipes in your vacant home:
When you are planning to leave your home for some time and you know the temperature will get below freezing you should protect your pipes. We can divide the solution into two parts: You can keep your heating system, or you can remove all the water from your pipes and turn off the heating system.
# Keep the heating on
– Set Thermostat to 55 Degrees Fahrenheit
There is no need to keep your house at a comfortable temperature, as this would waste a lot of energy. We recommend setting the thermostat between 50 and 60 degrees Fahrenheit to prevent pipes from freezing. Only when you know that the temperature in your region is really low, and your house is not well insolated you can increase it a little bit to prevent freezing.
– Keep the doors in your house open
To make sure the heat from your heating system is used efficiently you should open the doors in your house. If you have pipes hidden in cabinets open them as well. Often one side of the house cools down more than the other, and the open doors help the heat to travel to this colder area.
– Your Garage
Check if you have pipes that are running through your garage. If that is the case make sure that you close the garage door, so it is best protected from the cold.
– Insulate Pipes
If your basement or attic is not well insulated, it can be a good idea to add some extra insulation around pipes. The heat from the house has more trouble reaching these areas, and adding insulation is easy to do and is not very expensive. Check at your local hardware store for special sleeves made out of fiberglass or foam rubber that you can wrap easily around the pipe.
– Inspect your property
It is a good idea to Inspect the exterior of the property if there are any visible cracks. Now that your heating system is at a lower temperature they need to be sealed, so no cold air can enter them and can cause your pipes to freeze.
– Temperature alarm
If you leave your house for some time it can be wise to install a temperature alarm. This is a system that will warn you when the temperature is below a certain threshold. So in case something happens with your heating system and the temperature gets too low you will get an alarm, and you can ask somebody to check. You would not be the first to find out that your heating stopped working, and all your pipes are frozen.
# With the heating off
When you choose to turn off your heating system you have to do some more work to winterize your pipes, but it will save you a lot on heating costs. Also keep in mind that besides your pipes there can also be other products that can not handle cold so well (like some paint, food that you stored, ..).
To winterize your house follow the steps detailed below:
– Step 1: Shut off the water
The first step is to shut off the main water valve. If you have a water tank also turn off the water pump and water heater.
– Step 2: Drain all the water
When the mains is closed you can now open all the taps and drain valves. Do not forget to put a bucket under the drain valves, depending on the location. Recheck that all your taps are open, both warm and cold water. A tap that is closed can mean that some water can remain in the pipes. You can leave the taps and drain valves open until you return after the winter.
– Step 3: Blow the remaining water out of the pipes
When you have opened all the taps and valves there will always be some excess water remaining in the pipes. Use an air compressor to blow this water out of the pipes.
– Step 4: Empty the hot water tank
To empty the hot water tank you should open its drain valve and let it discharge until it is empty. Take care that this can be more water than you think.
– Step 5: Empty the water tank
If you have your own water tank you have to drain the remaining water there as well. Make sure that also the one located in the rubber diaphragm is empty (that is used to build up the water pressure). You could add antifreeze to the jet pump case.
– Step 6: Toilets
To prepare your toilets first flush them and make sure the reservoir is empty. Then you should add antifreeze to the toilet. If the temperature in your area does not get very low you can also use salt.
– Step 7: Sinks
Also, add antifreeze in all your sinks and tub drains to make sure they will not freeze.
– Step 8: Fridge and Freezer
When the temperature is below freezing your fridge and freezer will not work very well. It is good to just empty them before you leave. Turn them off, and then leave the doors open.
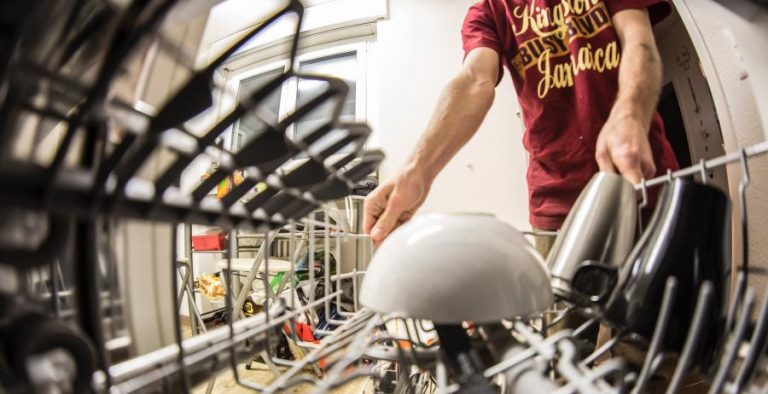
– Step 9: Dishwasher and washing machine
Do not forget to drain and winterize your dishwasher and washing machine. They are also using water, and excess water in them may damage them. Make sure to drain the excess water from them, check the manual on how to do it. And leave the doors open when you are finished.
– Step 9: Central heating
If you have a central heating system you have to drain this as well. Open all the drain valves and collect the water at the lowest point. Also, use an air compressor to blow the excess water out of the system. If you are unsure how to do this ask a professional to help you.

How to unfreeze a frozen pipe
Most North American houses have taps on their external walls either on the front side or on the backside. The pipelines located outdoors are prone to freeze as soon as the temperature drops below freezing. To unfreeze them follow the below-given step by step guide:
Step 1: Find what pipe is frozen
Search for the pipeline that is frozen by turning on all the taps in your home, and find the ones that are working, and the ones that are not. If you find that the water is running from one tap but not from another then the problem is located with the pipeline between these two taps.
Always leave all the taps in your house slightly open as small droplets of water dripping from them will prevent further freezing of the water inside your pipelines, and it will also help melt the remaining ice inside them. You must also leave the blocked taps slightly open to minimize the pressure on your pipeline. Before planning to tear apart your walls, you must first search for the problem in the most likely and easily accessible areas.
Mostly the pipeline system of your home is designed to keep the stagnant water out of your outdoor pipelines, so to locate the problem check the uninsulated areas first of all. Check the pipelines located in or near your attic, basement, crawlspaces, cold concrete, and cold air vents. Then check your outdoor spigots and valves.
To look at the backside of your pipelines attached to your walls, you can use a dental mirror. If you find a crack along the length of your pipeline or in their joints, then you must repair or replace it at once. Seek the assistance of a professional plumber if you are not up to the task.
Step 2: Find the exact location
As the next step, you must close your main shut-off valve. To locate the exact location of the frozen pipeline, you can use an infrared thermometer to find the areas colder than the other areas. You can also use the handle of your screwdriver, knock on the pipe, and listen for a more solid and less hollow sound.
Step 3: Warm the frozen part of the pipe
When you find the frozen part you have to melt it using a heat source. There are several ways of doing this:
– Heat gun:
you can use a heat gun or your hairdryer to melt the ice. The heat gun is suitable only for metal pipes. The PVC pipe cannot withstand a temperature even as low as sixty degrees Celsius or one hundred and forty-degree Fahrenheit.
– Hairdryer:
If you are using your hairdryer then keep running it back and forth along the length of your pipeline. Never place your hair dryer directly on your pipeline as sudden or uneven heat can rupture it. You must heat your outdoor valves cautiously and slowly as they have fiber washers and non-heat safe rubber rings inside.
– Electric heat tape
You can also use electric heat tape and apply it in a single layer along the length of your frozen pipeline. Now plug it into your wall outlet. It will warm up your pipeline. Never overlap the electrical heat tape, only apply it once in a spiral pattern.
– Heat lamps
You can also use heat lamps, bare incandescent light bulbs, or space heaters near the frozen pipeline but make sure they are not touching it. Hang up a few blankets or tarps to trap the heat near the pipeline.
– Towel soaked in hot water
A towel soaked in hot water is also helpful in thawing your pipelines. Boil some water. Put on a pair of rubber gloves. Soak the towel, ring it, wrap it around your pipe, and replace it every five to ten minutes.
– Salt for a frozen drain
If your drain is frozen you can sprinkle some salt down the drain to help melt the ice. Leave it there for some time.
Step 4: Check for leaks
This is maybe the most important step, you have to check for leaks. Some leaks are very obvious, but some are hard to spot, or can only show themselves after some time. If you know the area that was frozen it is easier to check a couple of times in the weeks following.
Winterizing an irrigation system
Your irrigation system or sprinkler needs to be winterized as well. You can follow the steps detailed below:
– Step 1: Turn off the water
The first step is to turn off the water. If your main shut-off valve is at such a depth that it will not freeze it is always a good idea to wrap it is insulation to further protect it.
– Step 2: Turn off the controller
If you have an automatic system with a timer you need to turn the system off. Check your manual if you do not know how to do this. If your system uses a pump you could disable it, so you are sure it will not run without water.
– Step 3. Drain the pipes:
The next step is to drain the water from the pipes. Open the drain valves and let the water out of the system. If your system has several zones, make sure that each zone must have its own drain valve. Be sure not to block the air vents and drain outlets on backflow preventers.
– Step 4: Blow out the excess water
Use an air compressor to blow out the remaining water in the system. If you are not sure how to do this ask a professional to help you.
Safety Precautions to observe while winterizing the pipes in your vacant home
– Small damage
Aaron Knepp advised keeping detailed notes while inspecting your plumbing. You must note down the details of any issue you might see while inspecting your pipelines. If your system has seen some damage for whatever reason, Knepp said unless the damage is severe, you should still easily be able to perform the winterization process and repair the damage come spring.
– Major damage
If the damage is major, he said, it is important to go ahead and make the necessary repairs as quickly as possible before attempting to winterize the system. As a next step, you must be sure to drain all of the water and pump down or drain the underground pipes. A lot of underground pipes will be located far enough down that they will not receive much freeze damage, however, they will still require pumping or draining enough water from them to ensure the upper portion of Z-pipe risers and pump manifolds are empty, to do this, purge the system with air or by modifying a fertilizer pump, to pump the system at its lowest outlet or inlet point.
– Working on your drain
Before taking apart the drain or taking off a cleanout, stop and ask yourself if it is possible that the contents of your pipeline will splash in your direction. Most drains are not under pressure. But a blockage or clog in your drain will build maximum pressure because of the gravity and weight behind the blockage or clog.
– Drain machine
When you will be using a drain machine, you must wear a pair of latex gloves under your leather gloves to protect your hands from the germs found in drain lines. You must also be extra careful and cautious when soldering or heating your pipelines. You must use a heat shield to protect any nearby flammable things while using a heat gun or hairdryer.
Use a pair of safety goggles, when snaking a drain, hammering the nails, drilling, reciprocating a saw, and also while working underneath your sink looking upwards. Contaminants like the drain gunk or sewage can splash into your eyes. When winterizing your system, keep in mind that you will need to wear ANSI-approved eye protection, as compressed air could cause serious injury to your eyes.
– Safety when using an air compressor
You must avoid standing over any components of the system during the blow-out process. Do not exceed eighty pounds per square inch (psi) when using an air compressor, and try to avoid compressed air on the backflow device because the rubber seals on a pressure vacuum breaker could potentially melt due to the heat of the air.
– Dust
You must use a disposable face mask to protect your lungs and prevent the inhalation of dust particles. When the pipes have been blown out, avoid exposing them to more compressed air since this can cause friction and heat that will cause damage to the system. Do not run the compressor unless at least one of the control valves is open.
– Opening a drywall
Never break through your drywall until you are a hundred percent sure where the location of the frozen pipe is. Make sure the ground and the surrounding area are fully dry when using electrical equipment to melt the ice. Don't use a torch or a flashlight to heat your frozen pipeline, it will cause damage to the pipe and start a fire.
– Do not use chemical products
Never pour acid, chemical detergents, or a drain opener down the frozen pipeline. They will create too much gas and heat and thus burst the pipe. Warm water not boiling water can be used in a very small quantity but it can be risky.
– Do not use a welder
Never use a battery charger or an electric welder to thaw your frozen pipelines. A battery charger is hazardous, while a welder will weld your pipe shut permanently.
Frequently Asked Questions (FAQs)
– What is antifreeze?
Antifreeze is used to lower the freezing point of any water-based liquid. It is a mixture that is used to get freezing point depression for the colder regions. It increases the boiling point of any fluid which allows the higher coolant temperature and prevents overheating.
RV antifreeze is a non-toxic material. It is used for pumping into your plumbing system. Automotive antifreeze is an entirely different thing. Some types of RV antifreeze are toxic and can only be used in an engine cooling system. There is a difference in their formulas. Propylene Glycol is non-toxic and the safest of all types of antifreeze. An RV antifreeze will protect your engine against corrosion. It helps in heat transfer. It will also prevent the scale from building up inside your engine.
If the water is not draining down your bath, sink, or washing machine then you can use antifreeze or when the temperature does not go down a lot in your area you can pour some household salt down your drains to lower the freezing point of the water.

– Why do the hot water faucets freeze even before the cold water faucets?
The two main reasons are that your hot water pipelines are more exposed to the cold breeze by being located closer to your external wall than your cold water pipelines. A second possible reason is that some ionic impurities are discharged from your water heater. The ionic impurities will decrease the freezing temperature of the water by a degree or more, making it more prone to freezing, depending on its concentration.
If your local weather is expected to warm up within a day or a couple of days, using bottled water until then will save your effort, money, and time, then using electric equipment and energy to thaw your frozen pipelines.
– How long will it take for a pipeline to thaw using a hairdryer?
The efficiency of your blow dryer and the length of the pipeline will determine the exact amount of time needed to thaw them. Heating from the water source first is the quickest way to thaw them, especially when there are bleed valves to open slightly. Keep checking your progress when heating to find out if the water has started to flow again.
The efficiency of your water heater and your outside temperature will determine the exact amount of time taken to heat the water after your pipes unfreeze. An average household water heater will take half an hour maximum to fully replenish the hot water again.
Final remarks
In order to conclude this blog post, I would say that you must follow the winterization guidelines every winter before leaving your house for the snowbird season. It will save your plumbing from expensive repairs and also increase the resale value of your property. It will also help save a lot of time, effort, and energy when you come back in the spring.
Always observe the necessary safety measures while winterizing your pipelines.